Inspired by Samin Nosrat’s book Salt, Fat, Acid Heat, and documentary by the same name, I was brave enough to try out the incredibly flavorful Crispy Persian Rice with Tahdig. I want to walk you through my first attempt following along with Samin’s amazing recipe. The results may surprise you!!
Let’s jump right in!
This post is part of our Basic Cooking Skills series. Each week we will be doing a deep-dive into one basic cooking skill and a brand new recipe to accompany it to practice that newfound skill. Check back throughout the series for updates and new posts.
Please note this post contains affiliate links, which means I receive a small commission, at no extra cost to you, if you make a purchase using the links. Please see my disclosure for more details.
Salt, Fat, Acid, Heat

I’d be remiss to not give you the opportunity to check out Samin’s cookbook, Salt, Fat, Acid, Heat. She is such a gem and her personality beams through her stories she presents.
Samin is so knowledgeable and the cookbook really explains these 4 elements of cooking in a way that makes you truly understand the science behind the cooking and how you can easily improve your cooking. Her recipes are amazing and the book is beautifully illustrated throughout.
I cannot recommend her book enough!
what makes crispy persian rice so good?

SALT.
As we learned in our 4 elements of cooking post, salt enhances flavor.
To make Persian rice, cook the rice in extremely salty water. As Samin refers to it in her recipe, “the water should taste saltier than the saltiest seawater you’ve ever tasted.”
Goodness that’s a lot of salt! I’m definitely not used to cooking with that much.
The rice only cooks in the salty water for a brief amount of time and most of it is rinsed, so you don’t have to worry about it overpowering the meal.
what is tahdig?
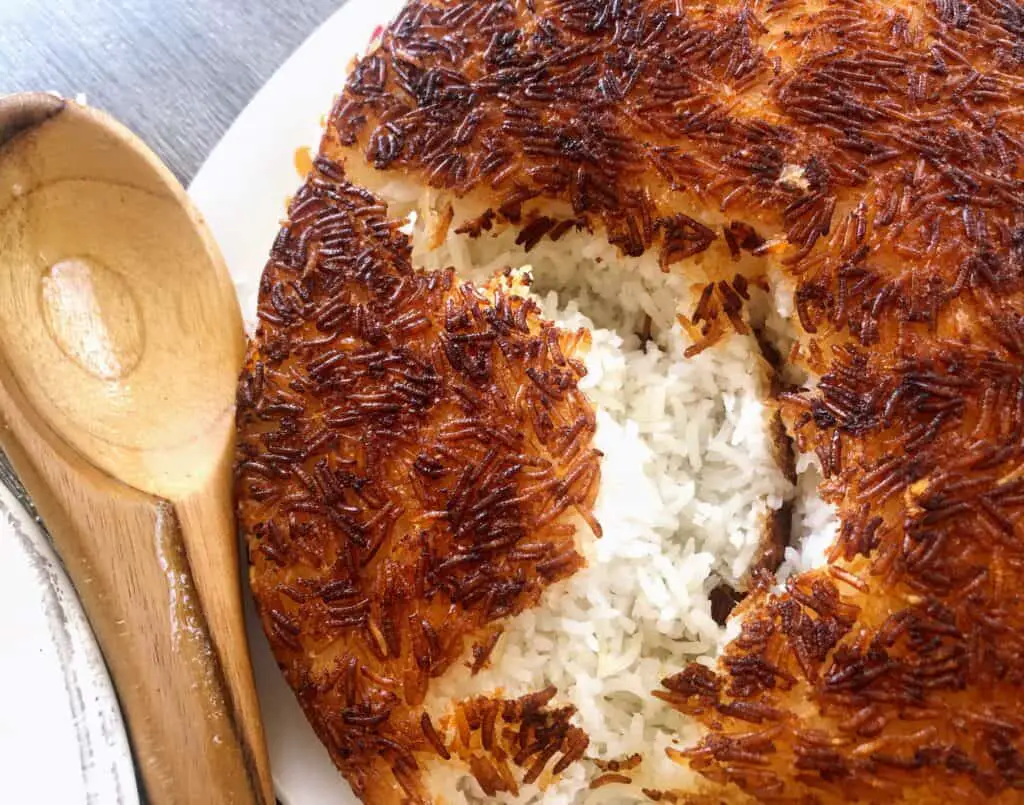
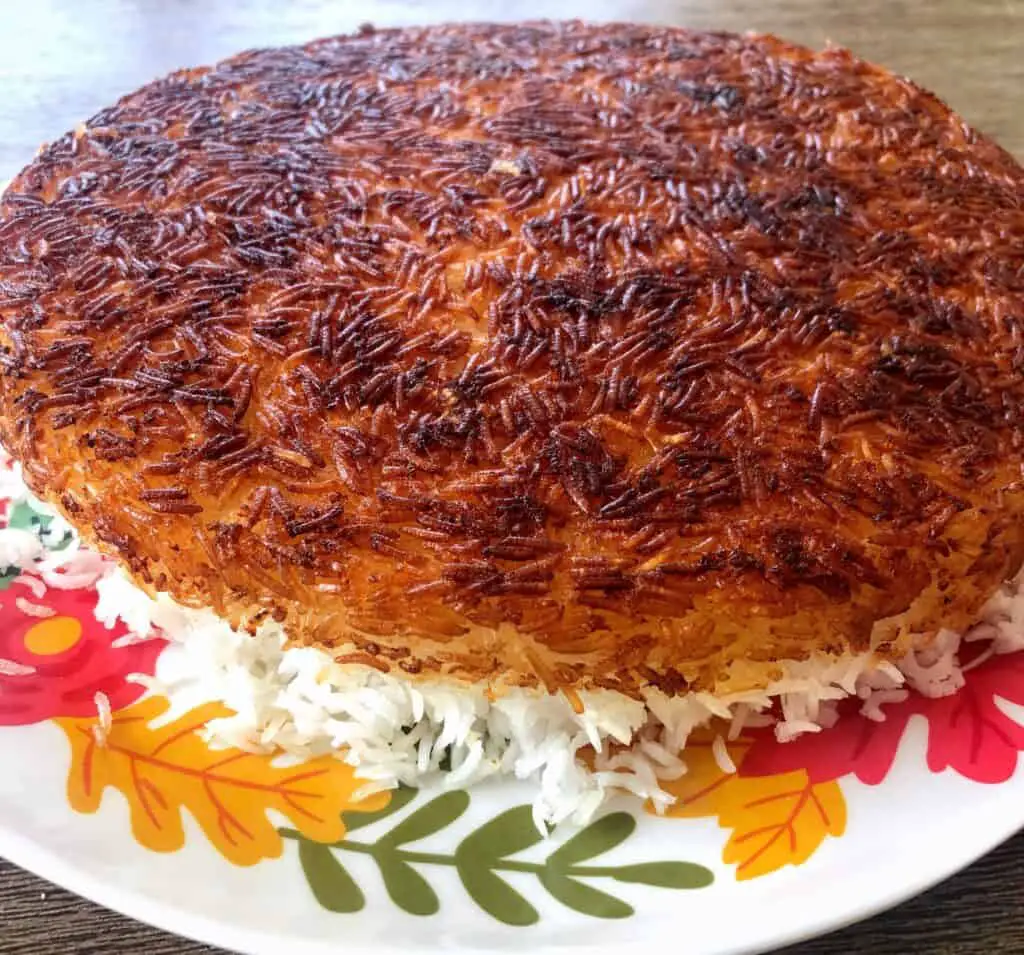
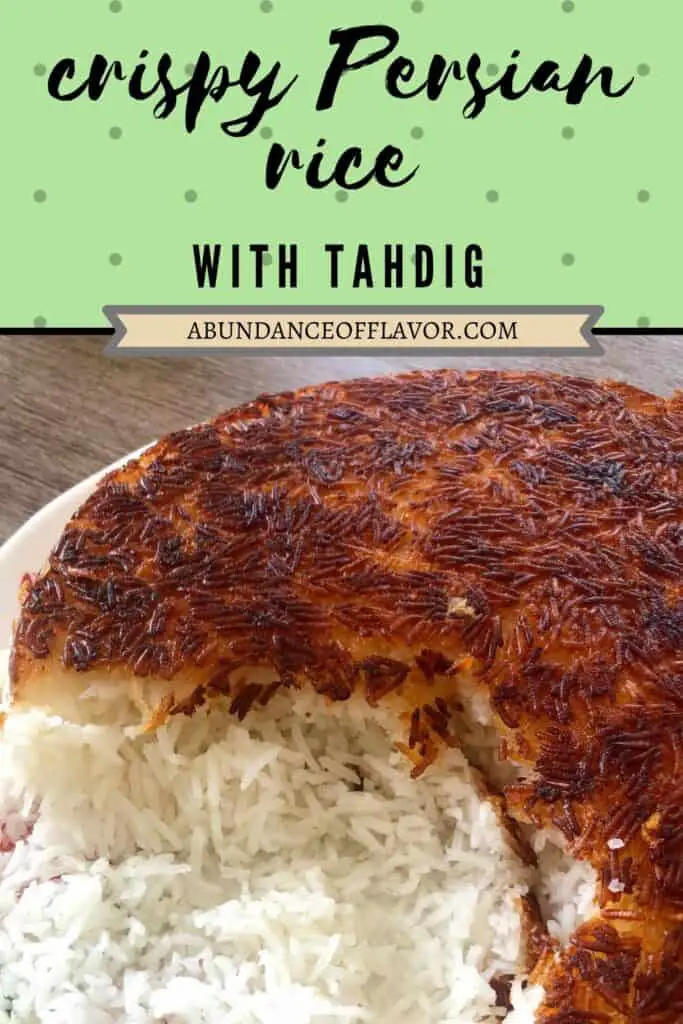
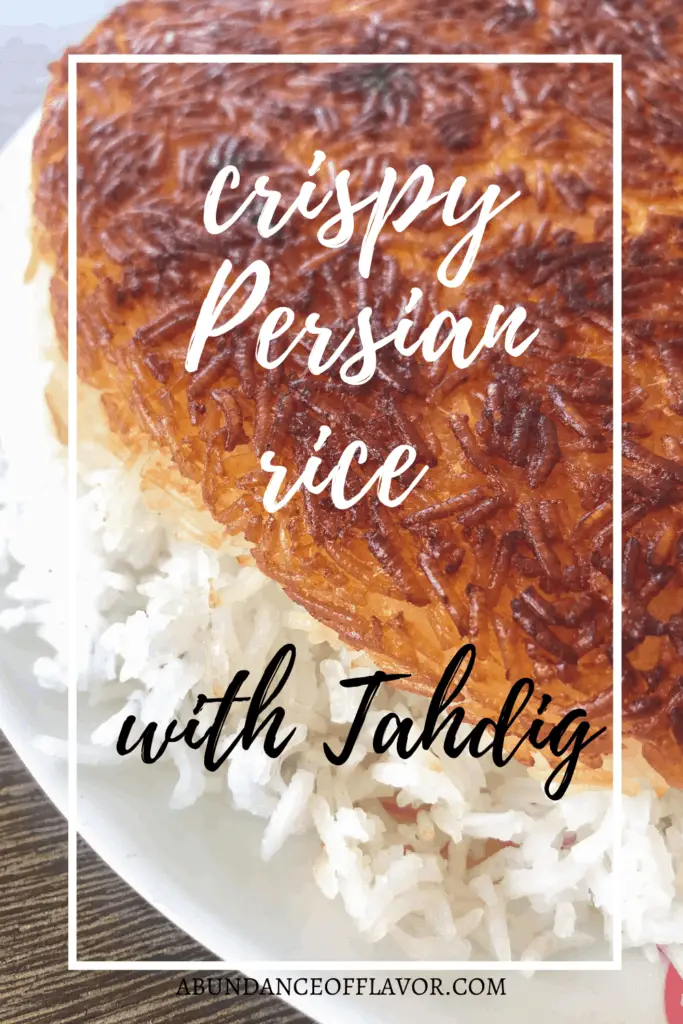
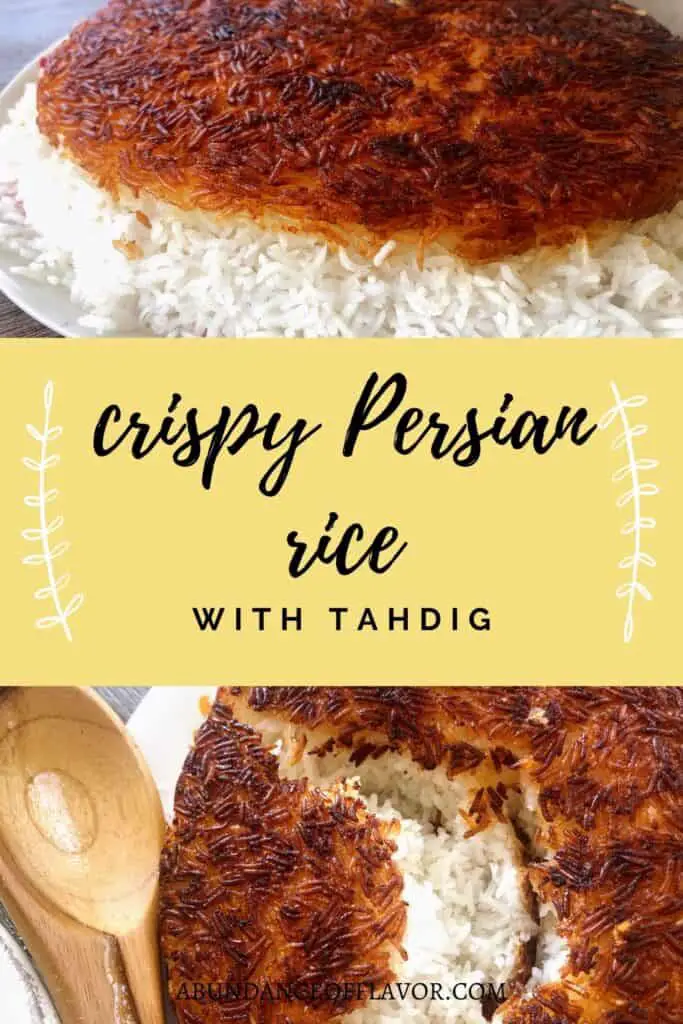
Tahdig is the delectable, crunchy, golden brown layer of rice that forms along the bottom of the pot. Tahdig literally means “bottom of the pot” in Persian.
Mixed rice and Greek yogurt form this bottom layer of yummy deliciousness that is pan-fried to perfection.
No matter how much you make, there’s never enough to go around!
The rice is incredibly tasty but the tahdig is untouchable!! We could not stop snacking on the crispy rice bits of tahdig and had to force ourselves to leave it be.
how to: partially cook the rice
Bring a large pot of water to a boil.
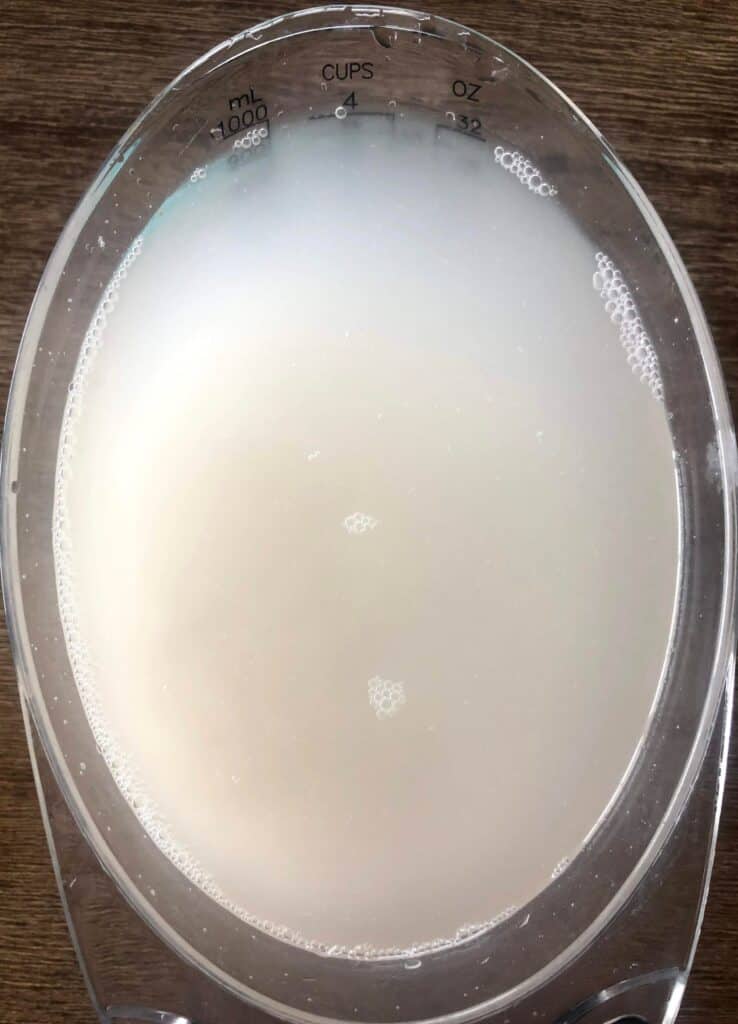
Rinse 2 cups of rice with cold water and strain. This process removes starch that would cause the rice to clump together. Repeat 6-7 times or until the water starts to run clear.
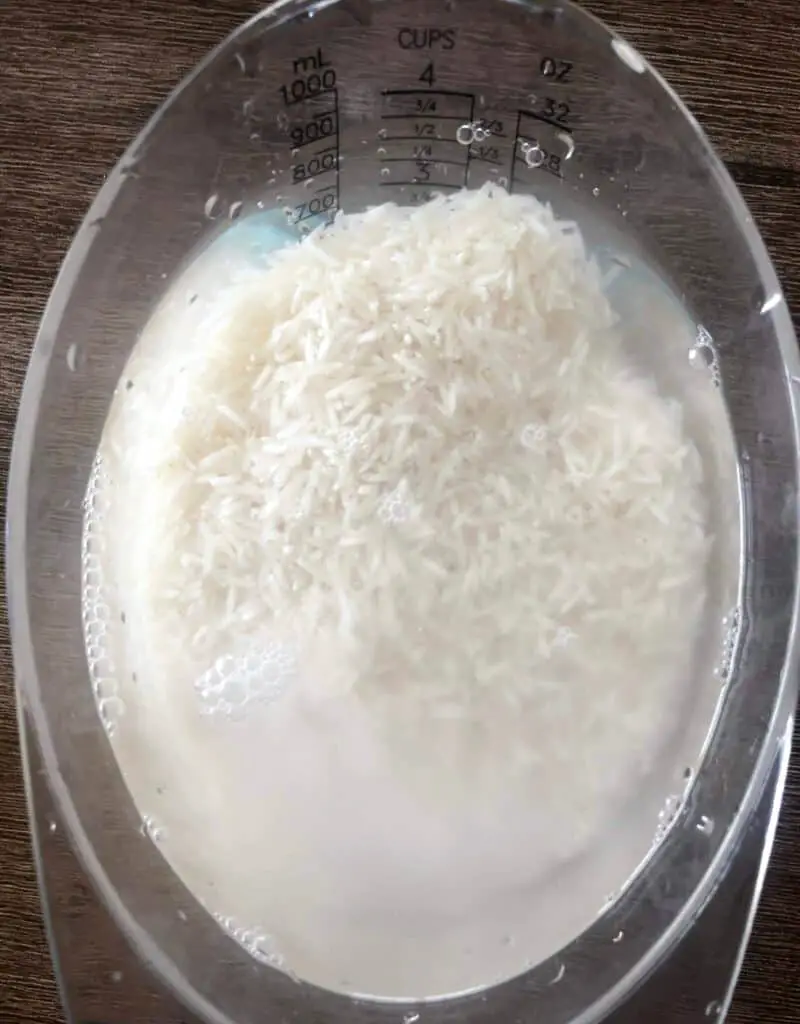
As you can tell, the water started out really cloudy but then look after just a few rinses!
Stir in the rice to the boiling water and add LOTS of salt. I’m talking on the order of a third of a cup! The goal is for the water to taste like the ocean and you should be concerned that you over-salted it, then you’re doing it right.
Salt greatly enhances the flavor of the rice in its brief cooking time.
Par-cook the rice for 8 minutes. It will seem like it’s undercooked, but it will continue cooking later in the pan, don’t worry.
Drain the water and rinse the rice in cold water so it does not continue cooking.
how to: prepare the rice mixture
To get a nice crispy tahdig we need to mix in Greek yogurt with the rice that will sit on the bottom of the pan.
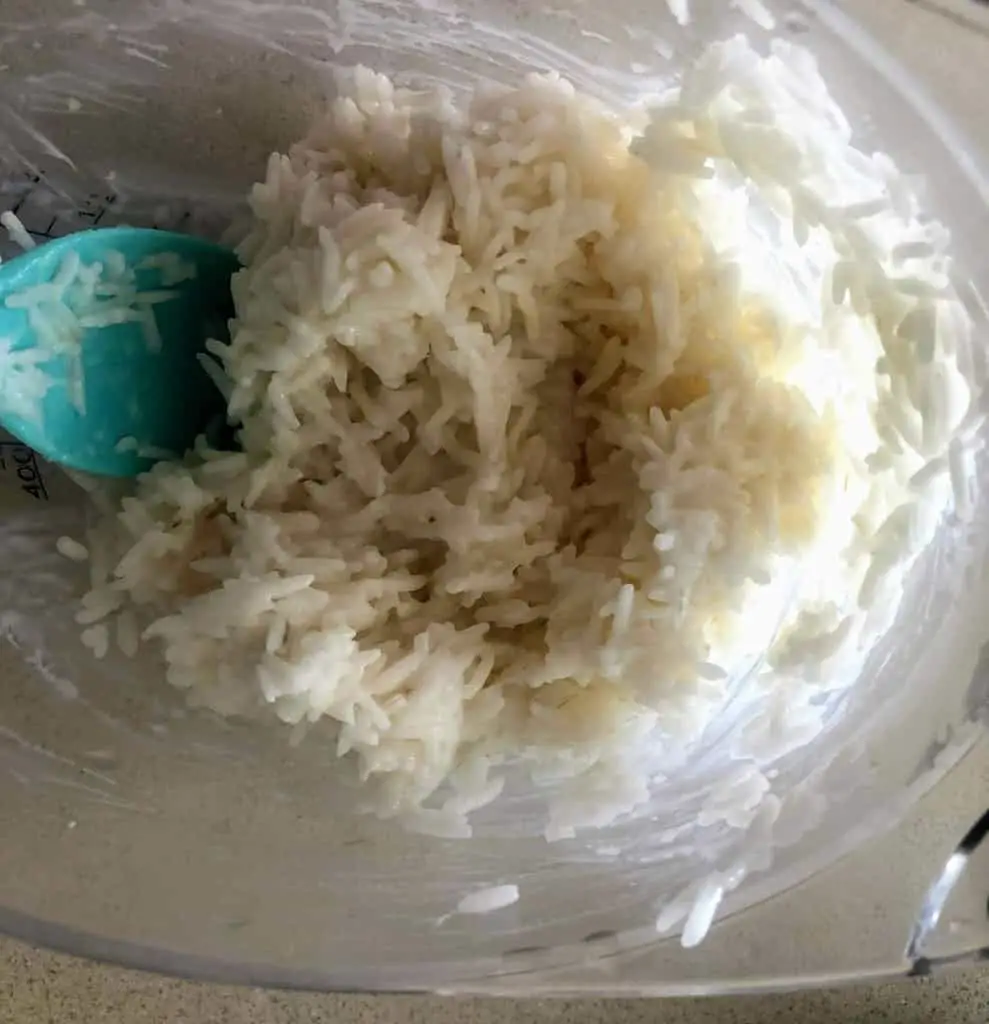
Separate a cup of the cooked rice into a small bowl. Mix thoroughly with 2-3 tablespoons of Greek yogurt.
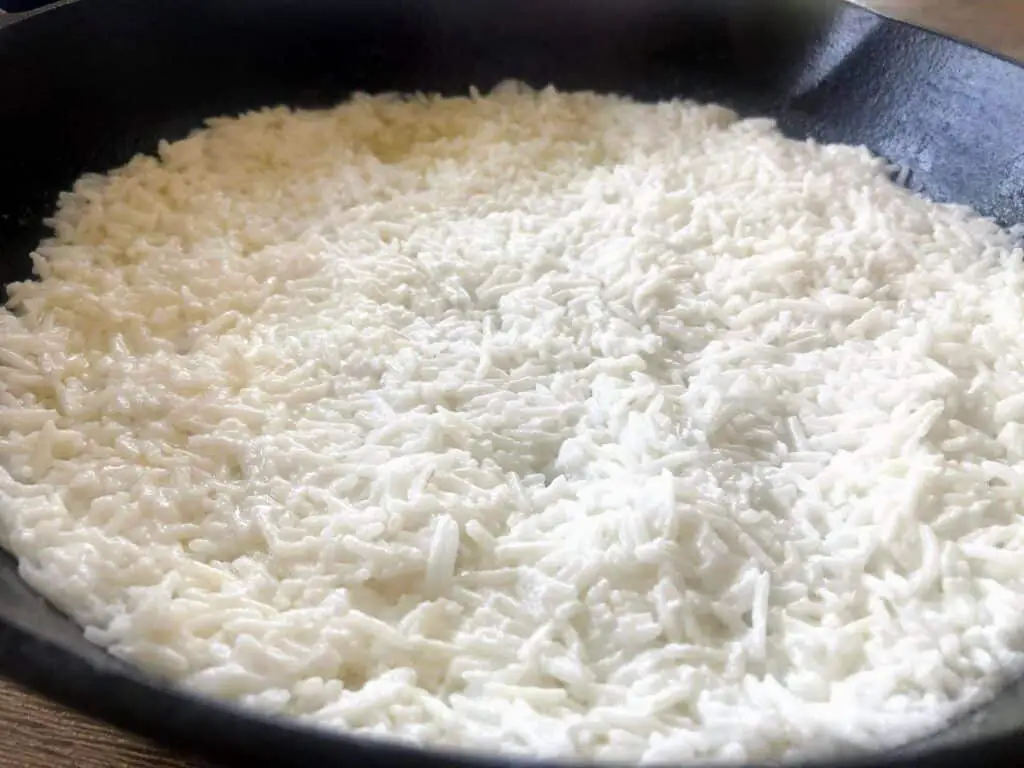
Over medium heat, add 3 tbsp butter and a few splashes of olive oil to a cast iron pan. Press the rice-yogurt mixture evenly into the bottom of the pan.
how to: cook crispy persian rice with tahdig
Pour the remaining rice on top of the rice-yogurt mixture and pat to form a slight mound.
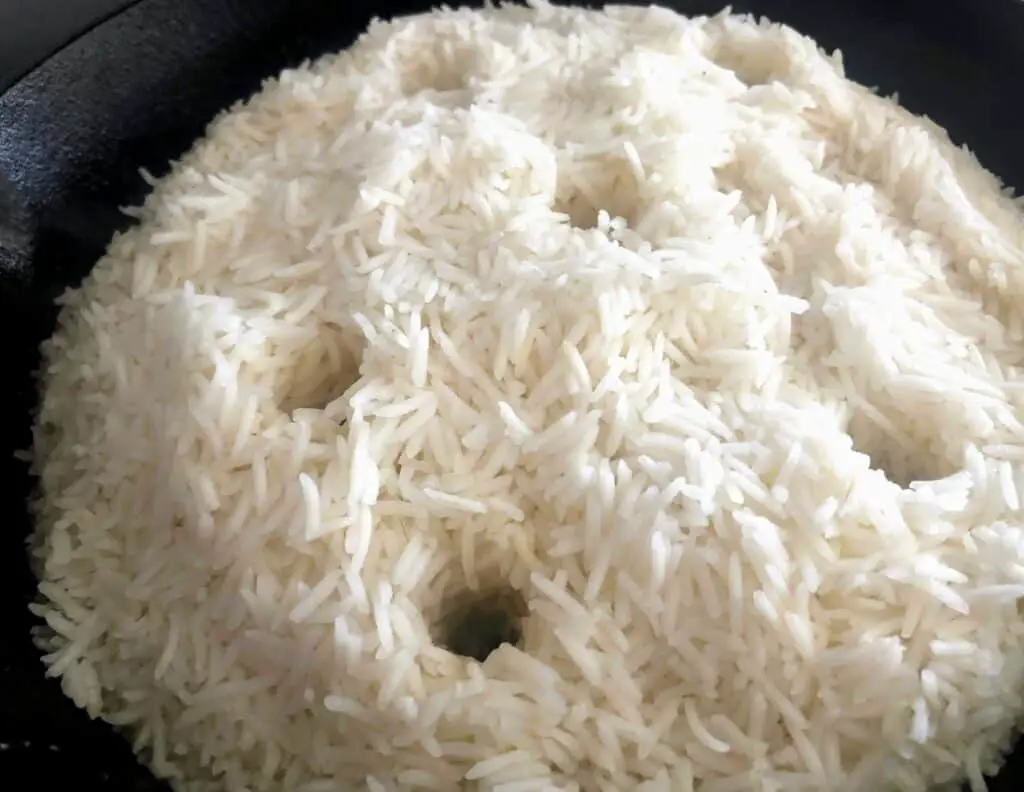
To help steam escape and aid the rice-yogurt mixture in getting extra crispy, use the end of a large spoon to make holes that reach to the bottom of the pan.
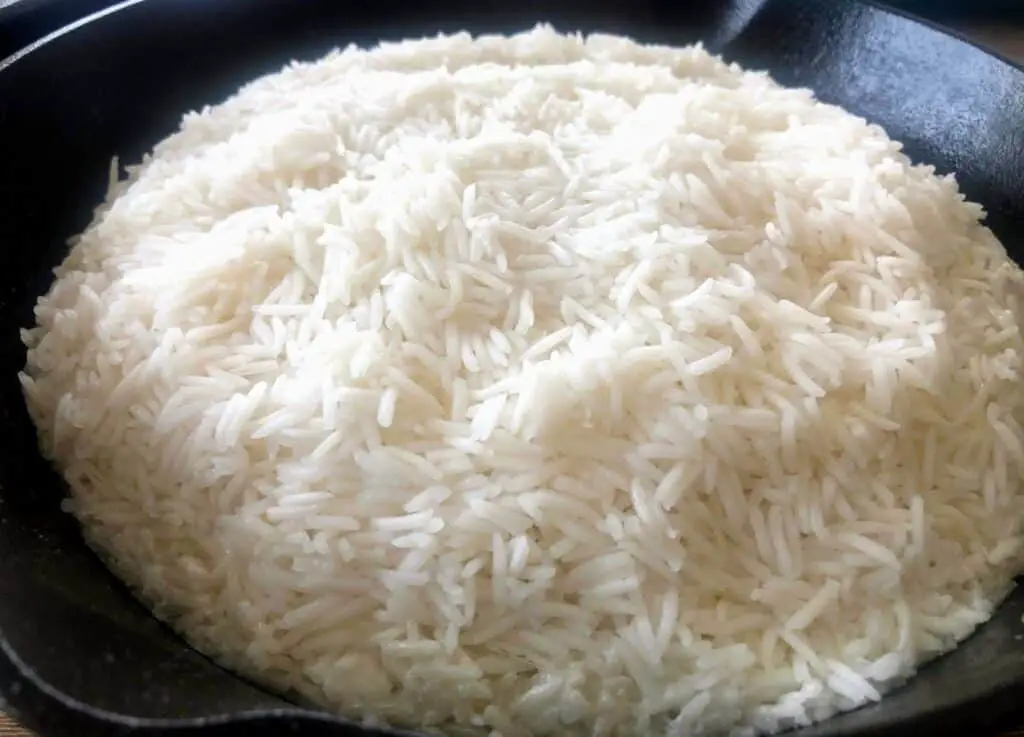
As the rice cooks it will expand slightly, almost filling in the holes you poked.
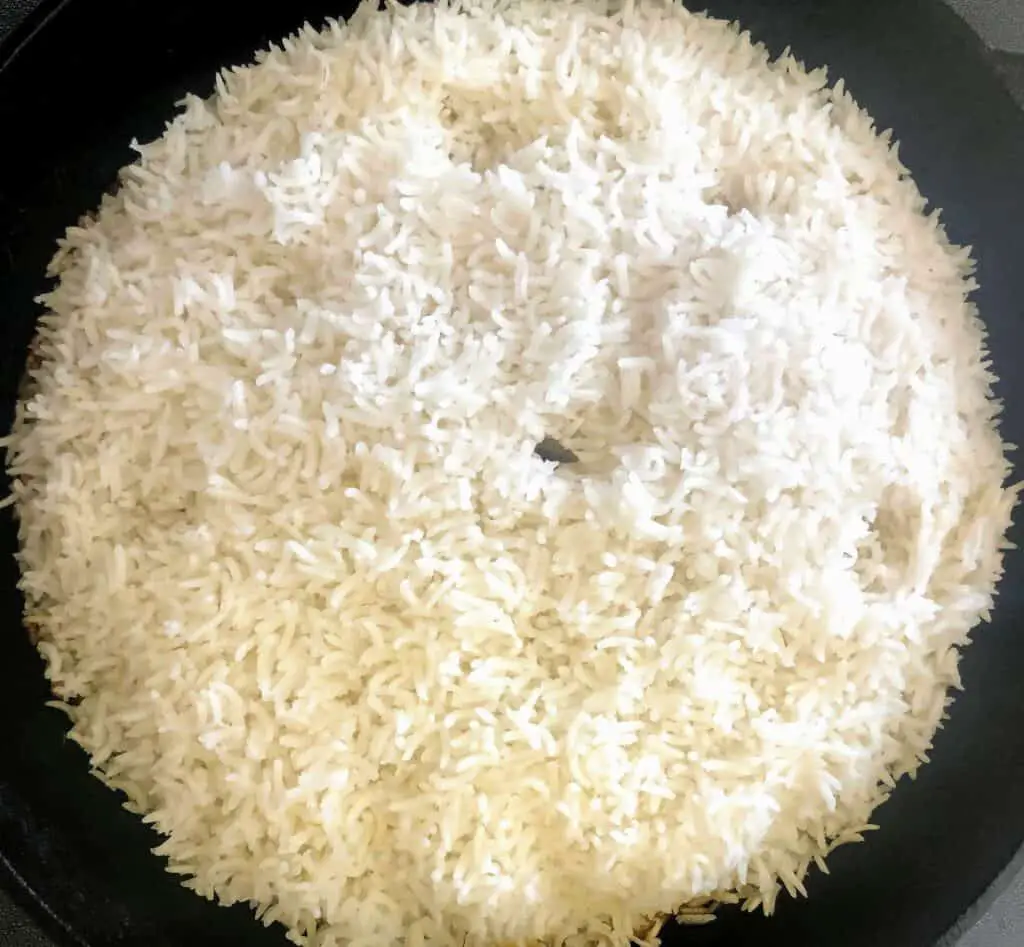
Cook the rice for 35 minutes, or until the edges of the bottom layer are nice and brown. To ensure even cooking, rotate the pan every 5 minutes as it cooks. I find that with a good cast iron pan that heats evenly this is optional, but if you’re unsure it’s best to rotate!
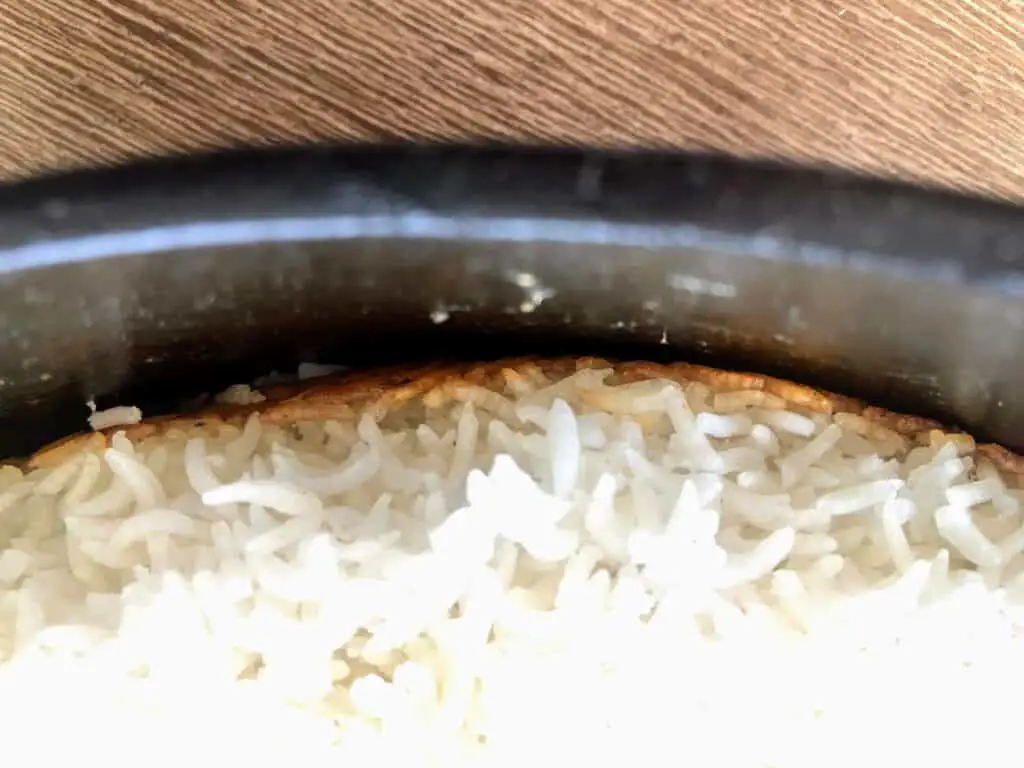
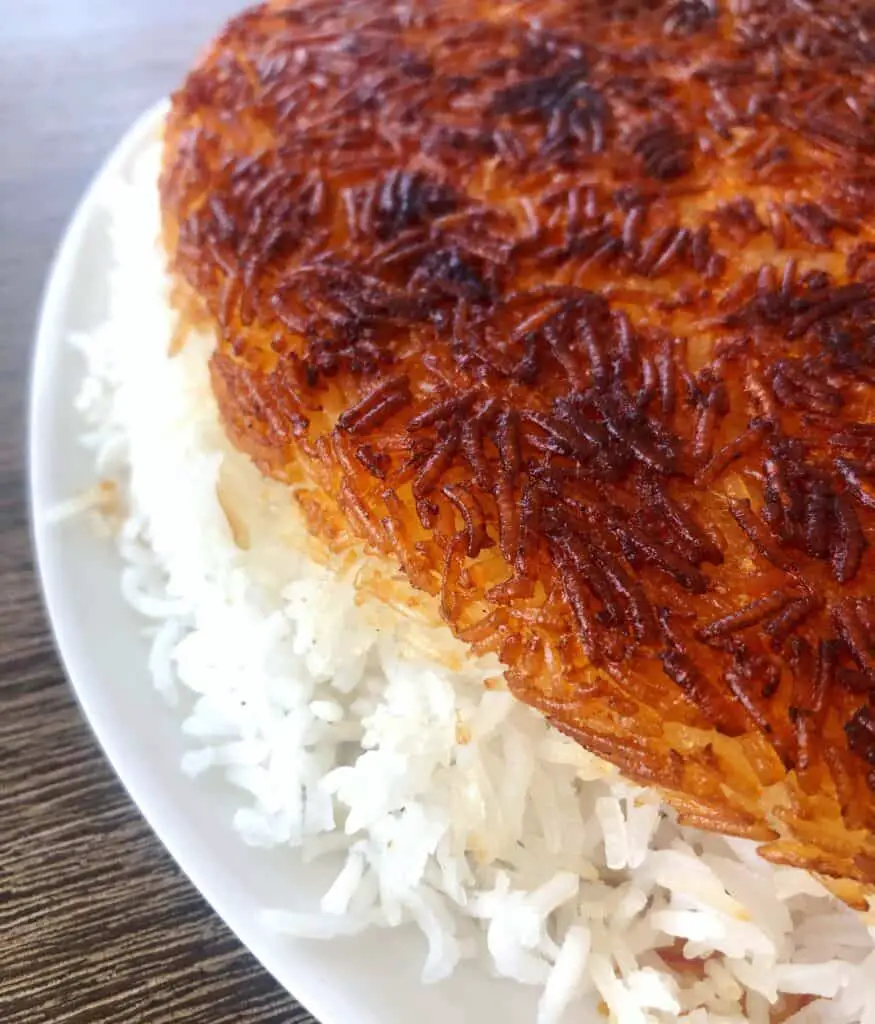
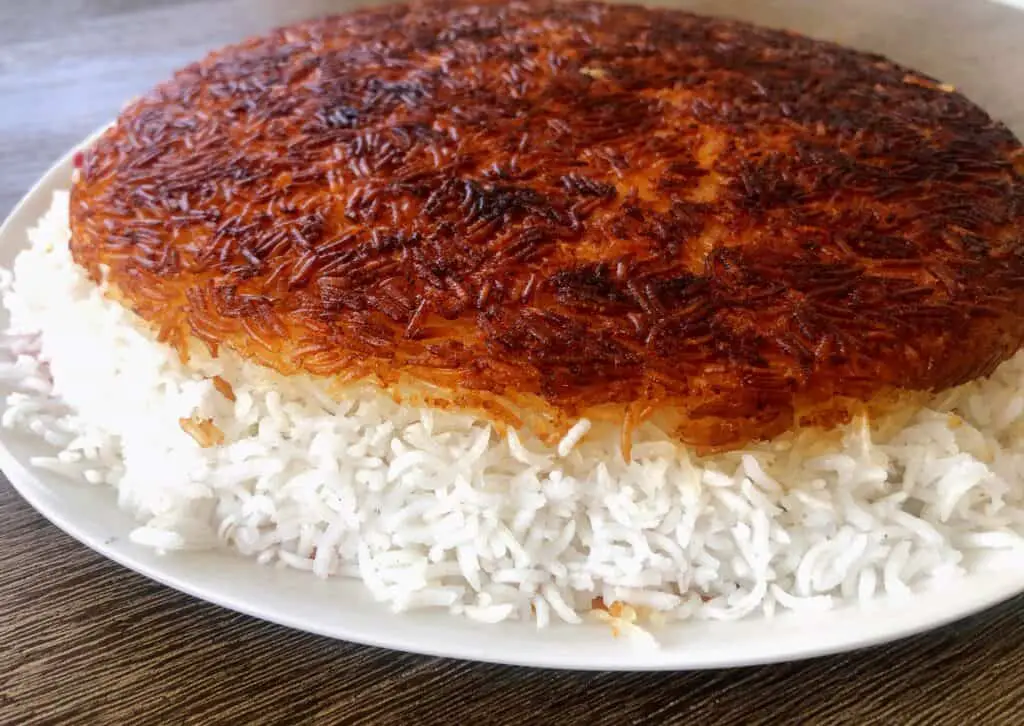
Once you start to see these beautiful golden edges, it’s time for the scary part….flipping it over!
Run a spatula around the edges of the pan to unstick any stubborn pieces. Place a large plate on top of the pan, grip tightly in both hands, and flip!
On my first try, I was lucky enough to get this beautiful tahdig and it didn’t fall apart either!!
If it breaks apart, there’s no need to feel bad and it was taste JUST as good, I promise!

Crispy Persian Rice with Tahdig
Ingredients
Method
- Bring a large pot of water to a boil. Rinse 2 cups of rice with cold water and strain. Repeat until the water runs clear.
- Stir the rice into the boiling water and add ⅓ cup of salt. Par-cook the rice for 8 minutes. Drain and rinse in cold water.
- Separate a cup of the cooked rice into a small bowl. Mix thoroughly with 2-3 tablespoons of Greek yogurt.
- Over medium heat, add 3 tbsp butter and a few splashes of olive oil to a cast iron pan. Press the rice-yogurt mixture evenly into the bottom of the pan.
- Pour the remaining rice on top of the rice-yogurt mixture and pat to form a slight mound. Use the end of a large spoon to make holes that reach to the bottom of the pan.
- Cook the rice for 35 minutes, or until the edges of the bottom layer are nice and brown. To ensure even cooking, rotate the pan every 5 minutes as it cooks.
- Once finished cooking, run a spatula around the edges of the pan to unstick any pieces. Place a large plate on top of the pan and flip. Serve warm.
Pin me!
I’m still in disbelief that my tahdig came out in one piece!! I was overjoyed with its appearance and beyond thrilled with the taste, and I know you can do it too! What are some of your brave kitchen feats that you pulled off?? Share below!

Related Posts
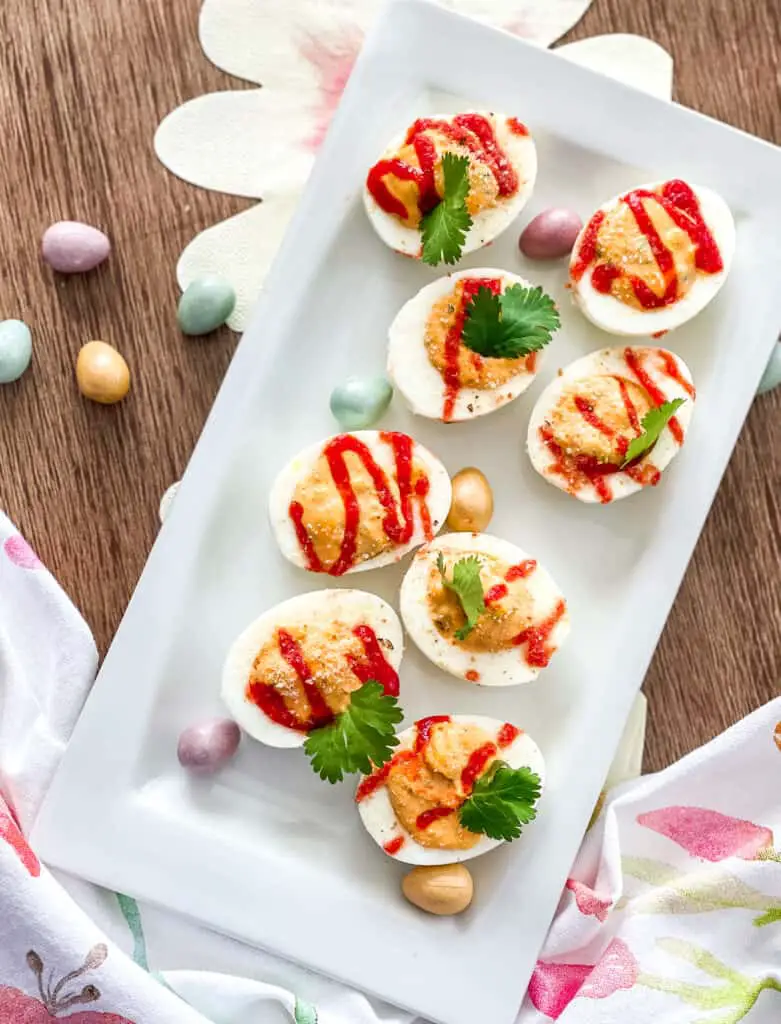
Spicy Jalapeno Deviled Eggs

Savory Brown Butter Baked Sweet Potatoes
This is a recipe I would never think to make, but it looks so delicious. You make it look so easy.
Thank you so much! I couldn’t believe how it turned out on my first try😂 It was a lot easier than I expected
Looks gorgeous and a must try. Thanks for sharing,
Thank you for your comment 🙂
Great recipe! 😀 I am so glad you shared your blog. Thank you.
Thank you for your kind words!:)
Pingback: 4 Elements of Cooking - Salt, Fat, Acid, Heat - Abundance of Flavor
This looks so cool and delicious! I’ll definitely be testing this out!
-Kyra | LoveKyra.co.uk
Thank you so much! Let me know how it turns out for you 🙂
Thanks for sharing this looks lovely and yummy 🙂
Nic | Nic’s Adventures & Bakes
Thanks so much for your comment!
Omg this looks so beautiful and tasty it’s making my mouth water. I would love to cook this for my partner and her family, I think they would love it 😁
Thank you so much!! I can’t wait to cook it for my family. The dish itself is unfamiliar to them but who doesn’t love rice right??
I saw that episode of Salt, Fat, Acid, Heat on Netflix, when Samin Nosrat taught us her mom’s recipe for Crispy Persian Rice with Tahdig. It looked so good! Your photos and instructions are perfect – it’s great to know how easy this was to make, thanks for sharing!
I wish there were more episodes of the documentary with more recipes! Thank you so much for your feedback!
This is a great post, i am not a great cook but this sound like something i would try my hand at making. Thanks for the great recipe ideas.
Thank you so much! It seemed intimidating to me as a new cuisine I had never tried before, but it was just so simple and delicious!
This looks delicious! Will have to give it a try.
Let me know how it turns out for you!😉
Oh this looks so delicious 🤤🤤 thanks for sharing.
Thanks so much!! 🙂
Oh my! Were always looking for new recipes. Ill be sure to show ours.
Thank you so much for your comment!
This looks amazing, I love rice dishes :))
I do too!! Thanks so much 🙂
This looks so delicious, I cook rice but never like this. I like Learning new things, so this is great. Thank you for sharing
I like learning new ways of cooking “normal” things too 🙂 With rice especially being one of those.
This looks amazing, will definitely try cooking rice this way!
It’s such a unique way to make rice and really is SO good
This looks so tasty! I’ve never tried tahdig before, but this dish looks really good. Thanks for sharing the recipe.
This was my first time too! It’s definitely a household favorite now 🙂
This is something that I want to try….I’m not a good cooker but this recipe is interesting and sounds really tasty. Thanks for sharing
It’s such a unique recipe and I still can’t believe how easy it was to do! I could eat the tahdig nonstop
I’ve never heard of this dish before but it sounds so simple and tasty! I’ll have to give it a try soon!
I hadn’t before this either! It’s surprisingly simple and you feel so accomplished when you’re done!
I’m so confused, I read this recipe over and over but I couldn’t find where it says how much rice to start with. Did I miss it? Please help as I really want to make this.
I used Samin Nosrat’s recipe that you can find here and in her book! https://food52.com/recipes/82660-persian-ish-rice-samin-nosrat-recipe I will update my notes to include the amounts as well. Thank you for asking!
I love this recipe! I have never had Tahdig let alone made it! It sounds absolutely delicious and a recipe the whole family will love!
It is so tasty and worth every second!